martes, 2 de febrero de 2016

Color 'n Cream Crochet and Dream: Tutorial Flower Square V

Color 'n Cream Crochet and Dream: Tutorial Flower Square V: As promised, I present to you the tutorial of the Black-White-Grey Flower Square. This is not my own pattern. It's quite a classic p...

Tutorial Flower Square V


As promised, I present to you the tutorial of the Black-White-Grey Flower Square. This is not my own pattern. It's quite a classic pattern and I really don't have a clue where it's from. It's old and been done many many times. But since lots of you requested a tutorial on this square, I decided to share it with you.

I used mercerized cotton, Phil Cotton 3 and Catania. And I used a 3,5 hook, but I crochet very tight and most of you I would recommend a 3 mm hook.

I use the American terminology.
Stitches:
Slip Stitch (ss)
Chain (ch)
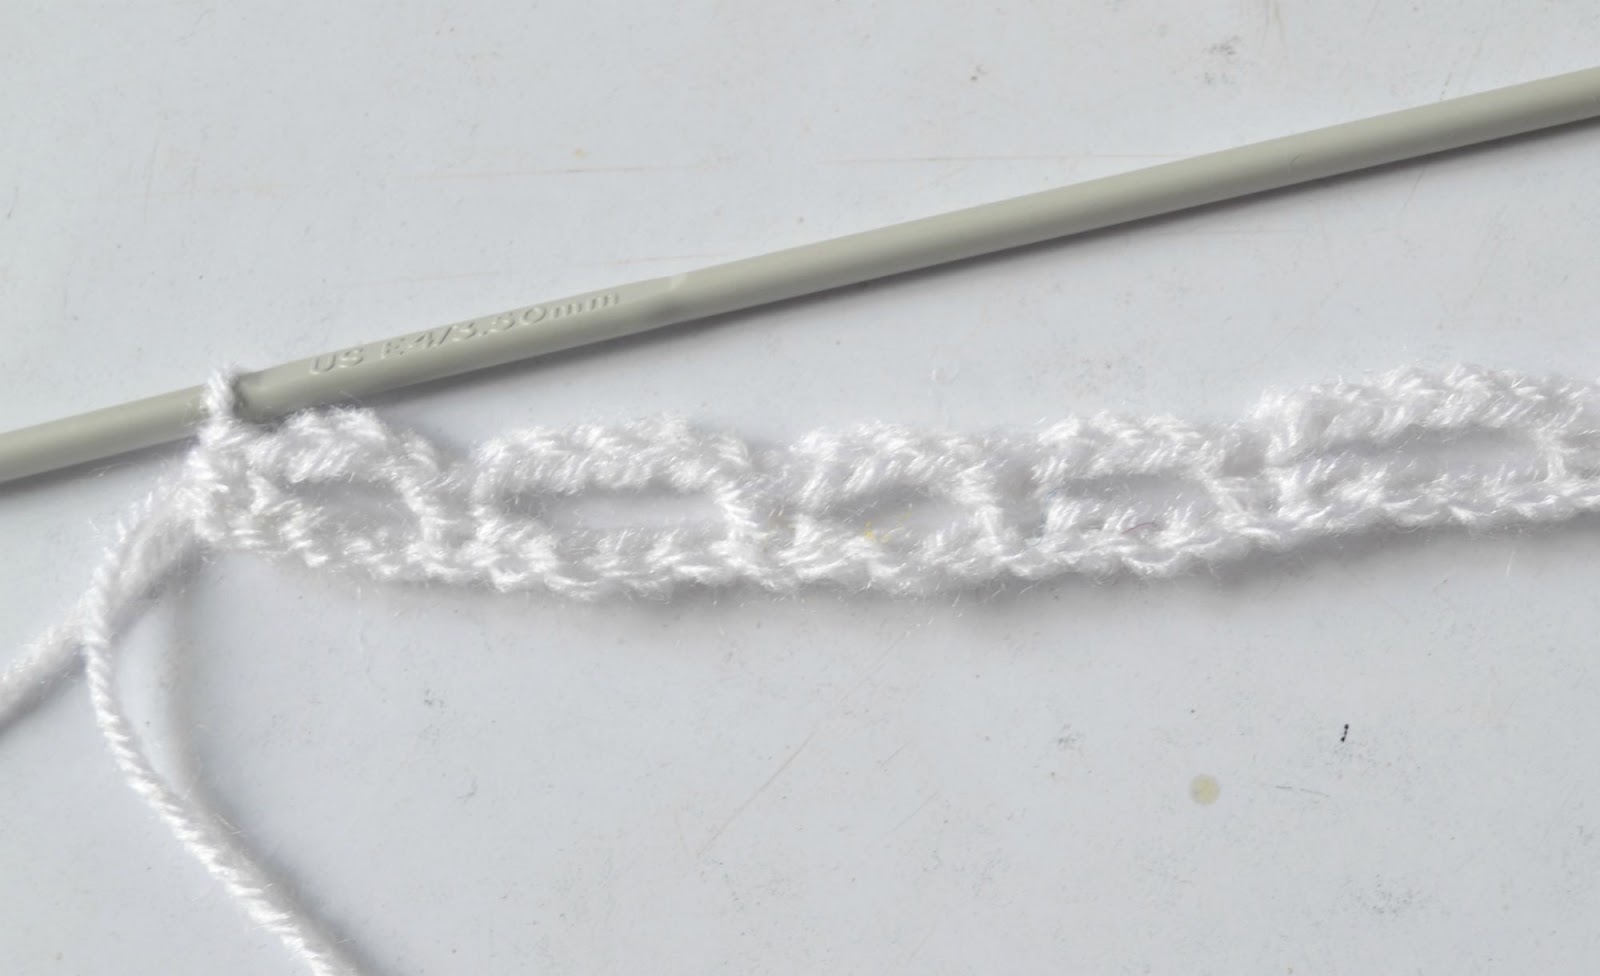
Half Double Crochet (hdc)
Double Crochet (dc)


Start with a magic circle (or chain 3, join with ss). 
Round 1: Ch 2 (or 3 if you prefer), 11dc. 12 stitches in total, join with a ss.
Round 2: Change color. Start in between 2 of the dc's from the previous round, ch 2, 1 dc in the same space, 2dc in next space, all around, join with ss. 24 Stitches in total.


Round 3: Change color, I used a contrasting color here. Start in the space between 2 of the 2 dc's from the previous round (see picture above), ch 2, 2 dc in same space, 3 dc in next space, all around, join with ss. 36 stitches in total.
Round 4: Change color. Start in the space between 2 of the 3 dc's from the previous round (see picture above). ch 2, 2 hdc in same space, *3 dc in next space, ch 3, 3 dc in next space, 3 hdc in next space*, repeat *to* until you've created a square. Join with ss. 
It's important to know that in this square, the corners aren't formed in one space, but by the ch 3 in between two spaces. That's the big difference from a 'normal' granny square.


I ironed the squares so they would be easier to sew together. I would recommend to sew these squares together, rather then to crochet them together. I think it's much prettier. Just hold the fronts of the squares to each other and put you needle trough 2 opposite stitches (see picture above). Just proceed with the next 2 squares in the same way. Then sew the other side together and this is what you'll get!


I made my first digital chart with Crochet Charts. It's a very simple program and easy to learn. I know this one isn't flawless yet, but I'm learning. I'm definitely going to purchase this software (for now I used a trial version). I know I forgot the starting ch 2's and the ss's, but hey, this is my first try!!


To make a cushion out of two sides, just join the sides with single crochet all around. For the picot edging: start in any stitch, ch 3, double crochet in first chain from hook, skip 1 (or 2) stitch and join with a slip stitch. Super simple! And if you only skip one the only important thing is that you have an even number of stitches. In a square that's always the case...


Well, hope it's clear. Feel free to ask questions, preferably through email. Do put in a link of the project you have a question about. 

Have a meaningful thursday!

Atelier Marie-Lucienne: Tutorial „Early Valentine“ Hearts - Anleitung Herz...

Atelier Marie-Lucienne: Tutorial „Early Valentine“ Hearts - Anleitung Herz...:   De ar friends ,   I had not come round to writing the pattern of the hearts of the „ EarlyValentine “ wreath in my last post .

Tutorial „Early Valentine“ Hearts - Anleitung Herzen „Früher Valentin“


Dear friends, 


I had not come round to writing the pattern of the hearts of the „EarlyValentine“ wreath in my last post yet, but I've got it ready now.
 

Notes:

  • I started each new round with a standing stitch (no chains) and made an invisible join at the end
  • Make two halves (will be joined in round 6)
  • Even though I used Gründl Cotton Fun (and a N°3,5 hook), the hearts can be crocheted in any yarn you like (using the corresponding hook).


 Materials:

  • crochet hook
  • yarn sewing needle
  • yarn in different shades
  • fiberfill


Abbreviations:

  • ch = chain stitch
  • dc = double crochet
  • dtr = double treble
  • htr = half treble
  • loop = loop made of ch
  • mc = magic circle
  • ss = slip stitch
  • tr2tog = 2 tr together


Instructions:

Start with MC
Round 1: 8x (tr2tog + ch 2)
  
Round 2: 8x (ch 3 in each loop)
  
Round 3:
  • it might be easier to start at the pointy end of the heart (even though I did not as you can see in the pictures); look at the following picture though for finding the right stitch to start from
  • (tr + ch 1 + dtr + ch 1 + tr) + 2 tr + 2x 1tr + 2 tr + 2x 1tr + 2 tr + 2x 1tr + 2 tr + (tr + htr) + dc + (htr + tr) + 2 tr + 2x 1 tr + 2 tr + 2x 1 tr + 2 tr + 2x 1 tr + 2 tr

Round 4:
  • again it might be easier to start at the pointy end = insert hook into dtr
  • (dc + ch 2 + dc) + 2x 1 dc + 5x 1 htr + 4x 1 tr + 2 tr + 2x 1 tr + 2 tr + 1 tr + (tr + htr) + ch 1 + skip 1 stitch + dc (in dc) + ch 1 + skip 1 stitch + (htr + tr) + 1 tr + 2 tr + 2x 1 tr + 2 tr + 4x 1 tr + 5x 1 htr + 2x 1 dc
Round 5:
  • decorative strips are made out of ss
  • look at picture for orientation
  • make one side at the time

Round 6:
  • join both sides with dc in each stitch, except:
    - skip both ch at the top of the heart 
    - (dc + ch 2 + dc) in both loops
    - do not forget to stuff the heart!


Happy crocheting!


P.S.: If you'd come across a mistake – please let me know!
P.S.2: I'll keep in touch!

Already made some more hearts...
..

Haak & Maak: Hartjesslinger

Haak & Maak: Hartjesslinger: Vandaag ben ik jarig. Nu ben ik niet iemand die elk jaar haar verjaardag groots viert, liefst doe ik gewoon iets gezelligs met mijn drie sch...

Heart Garland

Today it is my birthday. Now I'm not someone who celebrates her birthday every year great, I just love doing some fun with my three treasures. And this year my birthday is to taxiing of these three treasures.They have a busy schedule today. Besides a delicious cup of coffee (I got a new coffee machine, so one with beans, which I so long on my wish had been standing) with a piece of cake there will be not so much on my birthday brands and I am especially lot.


The garlands I hung yesterday for yourself stuck on. I wanted something different than the felt flag lines we get normally appear. I hooked only a few new flags lines that I could hang nicely. Youngest decorated as a surprise with the felt flags our bedroom. Flagline I feel so cozy. Whether dust or hooked, it looks so fun and festive! Not only inside but also outside in the garden. I searched on Pinterest a nice flag and began some time or 5 again. As often was not one pattern to my liking and I began but puzzling.Occasionally it seems mathematics. ;-) That obviously did not work right away, but after attempting or 10 I was satisfied with the result.


And what am I happy with my part-time job, where in addition at least I still have time to reflect on my ease patterns, all the moments are a bit more economical than a few weeks back.


Of hearts, I made a flag line. To see through the window lighting the hearts even better!


Pattern spring pendulum

I hooked the halyard with cotton and crochet hook 3.5.


EDGE
At the end of row 17 you two hook unload and go around the corner (to the left of the flag). For each stick hook you 1vaste followed by one individual.
At the next corner you hook three unload and go around the corner (to the bottom of the flag), then 1 sc in each open space, followed by one individual.
On the next corner you hook third landing and go around the corner (to the right of the flag), so each stick hook your first solid, followed by one individual.
At the next corner you hook three unload and you go around the corner (to the top of the flag), then the first fixed in any open space, followed by 1 loose. After the last loose hook you 1 sl st in the 1st single from the edge and attach you.

Crochet Tea Party: Granny Heart for Valentine's Day

Crochet Tea Party: Granny Heart for Valentine's Day: Here is a quick and easy heart to work up for Valentine's Day. I can't claim this pattern as my own, as I have seen numerous versio...

Granny Heart for Valentine's Day

Here is a quick and easy heart to work up for Valentine's Day. I can't claim this pattern as my own, as I have seen numerous versions of this all over the internet. But here is my offering of this little beauty.


You can download this pattern on Ravelry
  
   
Requirements:
    4mm crochet hook
    5g of Double Knit cotton yarn
    darning needle

Abbreviations:
    sl st slip stitch
    ch    chain
    sc    single crochet
    dc    double crochet
    tr    triple crochet
    sk    skip
    st(s) stitch(es)
    sp(s) space(es)
    beg   beginning
    rep   repeat


4 ch, join with a slip stitch in first ch to form circle.

Round 1:  3 ch (counts as first dc),
          2 dc in circle,
            *2 ch,
          3 dc in circle,
          rep from * twice more,
          1 dc in top of beg 3-ch to join.

Round 2:  3 ch (counts as first dc),
          2 dc in same sp,
          2 ch,
          3 dc in same sp,
          *1 ch,
          3 dc, 2 ch, 3 dc in next sp,
          rep from * twice more,
          1 ch,
          1 sc in top of beg 3-ch to join.

Round 3:  1 sc in next 2 sts,
          1 sc, 2-ch picot, 1 sc in next 2-ch sp,
          *1 sc in next 3 sts,
          1 sc in 1-ch sp,
          rep from * once more,
          **sk next 3 sts,
          12 tr in next 1-ch sp,
          sk next 3 sts,
          sl st in next 2-ch sp,
          rep from ** once more omitting last sl st,
          1 sc in 2-ch sp,
          rep from * once more,
          sl st in first sc to join.

Finish:   Fasten off and weave in ends of yarn. Block work.


The Lazy Hobbyhopper: Frilly striped pillow cover - free stitch pattern

The Lazy Hobbyhopper: Frilly striped pillow cover - free stitch pattern: Finally I managed to make a tutorial for the frilly stitch pattern. You can use this pattern to make a pillow cover as I did, or a

Frilly striped pillow cover - free stitch pattern


Finally I managed to make a tutorial for the frilly stitch pattern. You can use this pattern to make a pillow cover as I did, or a beautiful lacy afghan or a bag or whatever you fancy. I made a cover for a pillow measuring 14 x 14 inches using sport weight yarn and size E/3.50 mm hook.

Instruction

The pattern is written using American terms.
The pattern is worked top down.

Abbreviations:

ch - chain  
sc - single crochet (UK -double crochet)
dc - double crochet (UK - treble)
tr- treble crochet (UK - double treble)
st - stitch


To make a cover for a pillow measuring 14 x 14 inches use sport weight yarns of various colours and size E/3.50 mm hook. 

Start with making 80 chains. If you are making something else using the stitch pattern you will need to make chains in multiples of 13 and add 2 more chains to it. So it's multiples of 13+2. 

Row 1: For the pillow cover using colour A I made ch 80, sc in 2nd ch from hook, ch 3, skip 3 ch, sc in next ch, ch 5, skip 4 ch, sc in next ch, **[ch 3, skip 3 ch, sc in next ch] 2 times, ch 5, skip 4 ch, sc in next ch** Repeat from ** to ** 4 more times, ch 3, skip 3 ch and sc in last ch. Turn. 


Row 2: Ch 4, dc in same st, ch 1, skip the next ch-3 space, and **(2-dc cluster, picot, ch 1) 5 times in next ch-5 space, skip next ch-3 space, (dc, ch 1, dc - called V) in next sc, ch 1** Repeat from ** to ** across finishing the row with V worked in the last sc. Turn.

Note: 
  • 2-dc cluster is dc 2 stitches worked together in same space.
  • To make a picot, ch 3 and sc in dc cluster worked prior to ch 3, this will form a loop at the top of the cluster.

Row 3: Ch 4, dc in same st, ch 2, **dc in ch-1 space next to the 1st cluster, ch 5, dc in the ch-1 space before the 5th cluster, ch 2, V in next V, ch 2** Repeat from ** to ** across finishing with V worked in last V. Turn.


Row 4: Ch 4, dc in same st, ch 1, **(2-dc cluster, picot, ch 1) 5 times in next ch-5 space, ch 1, V in next V, ch 1** Repeat from ** to ** across finishing with a V worked into last V.


You will be changing to new colour at the end of row 4. For that, pull the new colour through the loop, tighten the loop and start working with the new colour. 

Row 5: Repeat row 3 using new colour.


Repeat rows 4 and 3 until you reach the desired length and finish with row 4. Change colour after every 4 rows.


You are not going to make a separate piece for the back part of the pillow cover, instead you will make one long piece, fold it into half and sew the sides. The back part consists of just treble stitches. Three rows of treble were equal to 4 rows of frilly pattern at the front. 

So when you have reached the length of pillow stop working the frilly pattern. Stop at row 4 repeat and continue the next row in the same colour that you are working with currently. My last colour was brown, so I continued with brown.

Row 1 (back): Ch 4 (counts as 1st treble), 3 tr in next space, **tr in next dc, 4 tr in next ch-5 space, tr in next dc, 2 tr in next ch-2 space, tr in next dc, tr in ch-1 space, tr in dc, 2 tr in next ch-2 space** Repeat from ** to ** across finishing with 3 tr worked into the last space and 1 tr in the turning ch of previous row (79 sts)

Row 2: Ch 4 (counts as 1st tr), tr in each tr across. Turn (79 sts).

Repeat row 2 changing colours after every 3 rows but this time you will be reversing the order of colours used in the front part. 


Weave in all the ends and fold it into half. Bring the wrong side out and sew/crochet the sides together. If you do not want the stitches to be visible through the sides of the lacy pillow use threads/yarns of similar colours which means you will have to change your thread colour every 4 rows. Sew buttons.


Please do let me know if there are any corrections to be made. 

Have a nice day! beaut...

Annaboo's house: The one with a bobble stitch cushion

Annaboo's house: The one with a bobble stitch cushion: I've been meaning to get this pattern out for months, I tell you. It's one of those which has been lingering in my design book, wai...

The one with a bobble stitch cushion

I've been meaning to get this pattern out for months, I tell you. It's one of those which has been lingering in my design book, waiting for me to take some photos and make a YouTube tutorial to accompany it.
And I've finally done it.


It's not at all difficult and involves a hook, yarn, some double crochet and some bobble stitches. 
And a few buttons.
And a cushion that measures 45cms*


* ok, that's a teeny lie. I used a 45 cm cushion, but this pattern can be easily adjusted for any size- see under the pattern for how to do it.

Onwards.

Bobble Stitch Cushion

Pattern written in UK terms
ch = chain
dc = double crochet
yoh = yarn over hook

To make the bobble stitch:
1) Yoh, hook into stitch, yoh, draw yarn through stitch.
    Yoh, draw yarn through first 2 loops (2 loops on hook)
2) repeat (3 loops on hook)
3) repeat (4 loops on hook)
4) repeat (5 loops on hook)
5) repeat (6 loops on hook) 
6) Yoh, draw yarn through all loops.


You need:
Hook and yarn (what ever you fancy here. I used 4 x balls of Lion Brand Wool-Ease Thick and Quick in Glacier (shade 105) and a 12 mm hook.
Cushion
Buttons (I used 4 x 2.5cm)

Pattern
Both sides of the cushion are crocheted in rows. At the beginning of each row, turn your work and ch1.

Front of cushion (make 1)

Foundation chain: ch31
Row 1: dc in each st across row (31 sts)
Row 2: dc 3, *bobble in next st, dc 3* repeat from * to * across row
Rows 3-5: dc in each st across row (31 sts)
Row 6: dc 5, *bobble in next st, dc 3* repeat from * to * across row, until you have 5 sts left, then dc 5.
Rows 7-9: repeat row 1
Rows 10-37: repeat the pattern: row 2, then x3 rows of dc, then row 6, followed by x3 rows of dc 

Back of cushion (make 1)
Foundation chain: ch31
Rows 1-37: dc in each st across row (31 sts)

To make up:
Align the front and back pieces with wrong sides together with the bobble side facing you, right-way-up. Beginning at the top left corner and working in a clockwise direction, dc three of the sides together. You will need to put 3 dcs in the corner stitches. Stitch a few buttons along the top of the cushion, on the wrong side of the bobble edge. Use the spaces between the stitches on the back piece as button holes.


To adjust this pattern to fit any cushion, you need to alter the width and height of the front and back panels. To adjust the width, make sure your foundation chain is a multiple of 4 and add 3 more. To change the height, simply add or subtract the total number of rows. 
Simples.

Enjoy all your crafty endeavours this week,
Sarah xx

Mi lista de blogs

Buscar este blog