domingo, 31 de enero de 2016
Crafting Friends Designs: Peaked Shell Afghan Crochet Pattern
Crafting Friends Designs: Peaked Shell Afghan Crochet Pattern: It's been a busy January! I have so many fun new designs in the works, but it will be a while before I can share them with you. To hel...

Peaked Shell Afghan Crochet Pattern
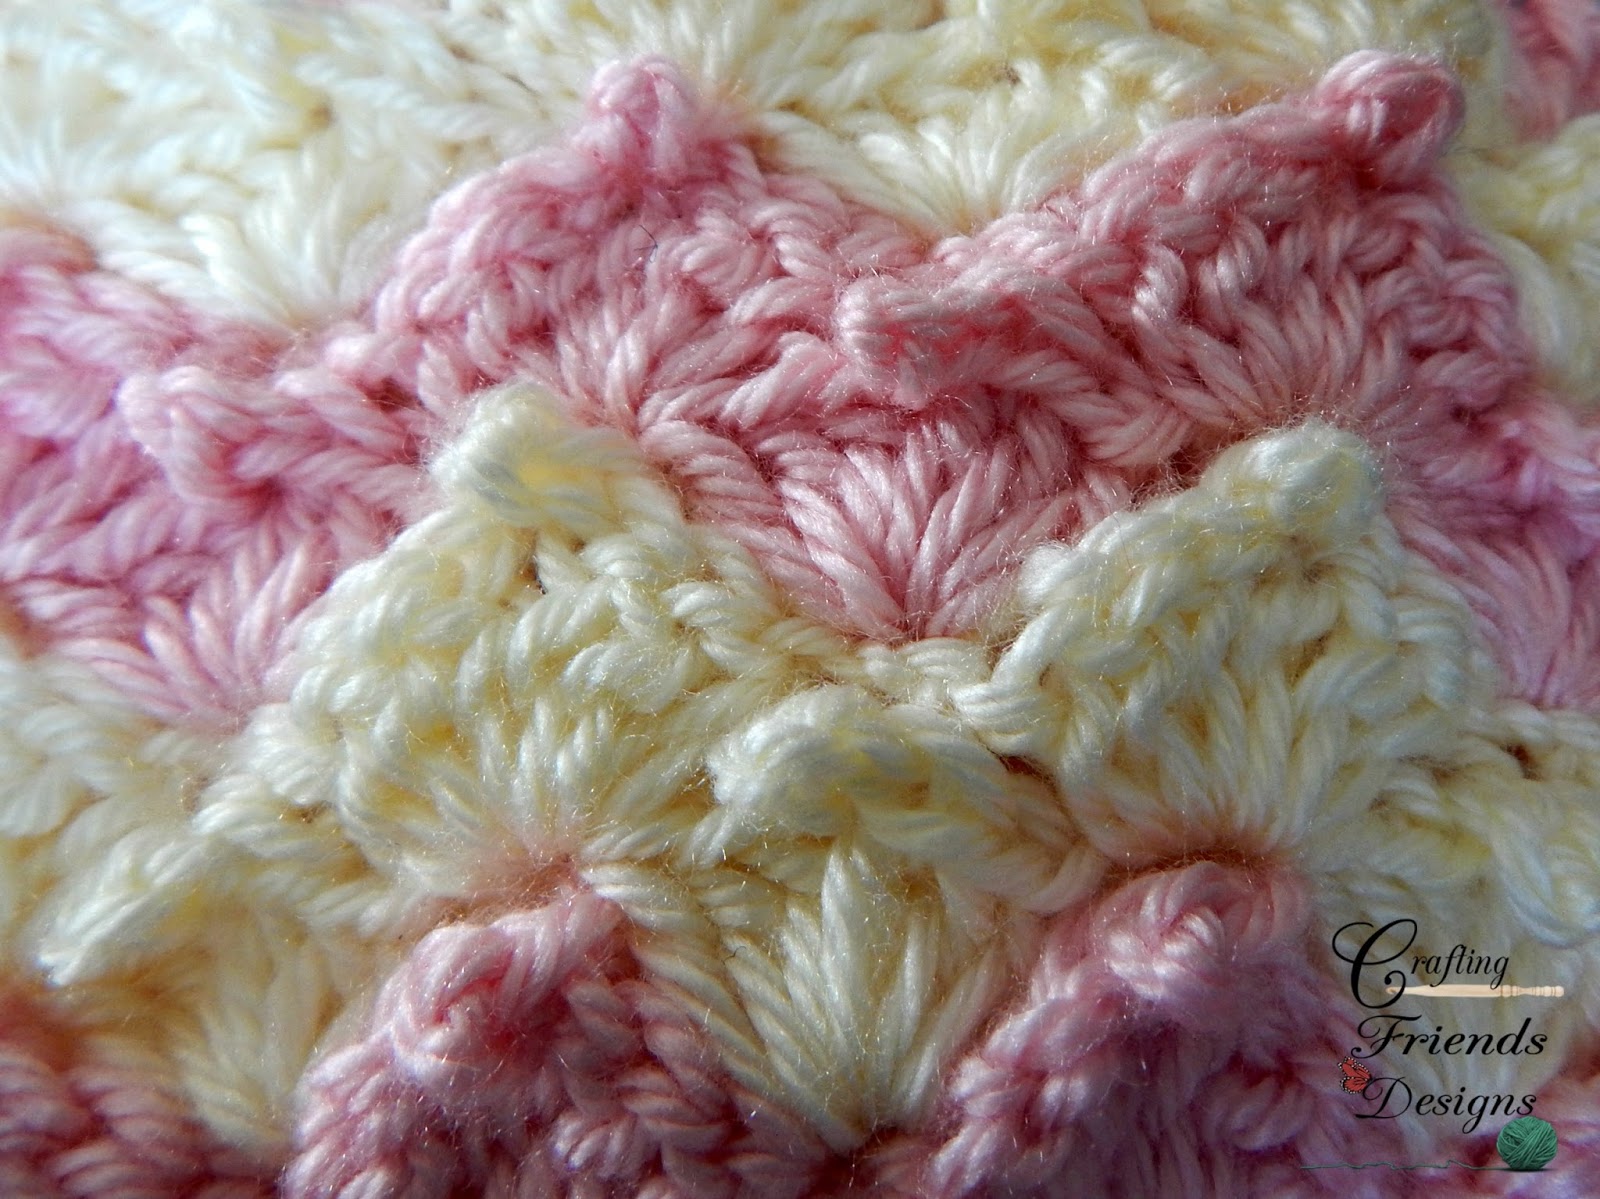
It's been a busy January! I have so many fun new designs in the works, but it will be a while before I can share them with you. To help fill in the gap of releases, I've worked up this pretty Peaked Shell Afghan crochet pattern for you. It's simple, quick and has a fun little texture!


An ad free printable PDF of this pattern is available for $1 in my Ravelry shop here: http://www.ravelry.com/patterns/library/peaked-shell-afghan
Materials: I chose to use Caron Simply Soft because I had a bunch on hand and my girls loved the colors. You could use any yarn for this project and just work it to your desired size.
Materials: I chose to use Caron Simply Soft because I had a bunch on hand and my girls loved the colors. You could use any yarn for this project and just work it to your desired size.
The qty of yarn will depend on the size of the afghan that you make. This will take around 2,500 yards for a 4'x4' size.
Hook: I used a Boye size H. Again, you may use your preferred hook size that works best with the yarn you choose.
Gauge: 3 DC & 2 Rows = 1"
Finished Size: Customizable
Skill Level: Easy
Stitches: St - Stitch
Ch - Chain
Sk - Skip
Sp - Space
Sl St - Slip Stitch
SC - Single Crochet
DC - Double Crochet
PS - Peaked Shell
Special Stitches:
Peaked Shell: 3 DC, Picot, 3 DC in same stitch
Picot: Ch 3, sl st in 3rd Ch from hook
HDC Foundation Chain:
Notes: Ch 3 at the beginning of each row counts as a DC
Change colors every 2 rows for a fun ripple color pattern
Begin with a HDC Foundation Chain in multiples of 4 + 1
61: 2' 89: 3' 121: 4' 153: 5'
(2 Shell rows = 2" wide & 1" tall)
R1: Ch 1, turn, SC in next st, *sk next st, PS in next st, sk next st, SC in next st,* Repeat from *to* across
R2: Ch 3, turn, DC in same sp as Ch, working behind picot, SC around the strand just below the picot of next PS (see photo), *PS in next SC, working behind picot, SC around the strand just below the picot of next PS,* Repeat from *to* across, 2 DC in end SC

R3: Ch 1, turn, SC in next st, PS in next SC, *working in front of the picot, SC around the strand just below the picot of next PS, PS in next SC,* Repeat from *to* across, sk next st, SC in end st
Repeat R2 & R3 to desired height
SC evenly around the edges to finish off. (I prefer to leave the shell section on top of this one instead of squaring it off)
Below is the result of changing colors every 2 rows
sábado, 30 de enero de 2016
the dream crochet blog.: DIY: How To Make This Crocheted Lamp Cozy// Free P...
the dream crochet blog.: DIY: How To Make This Crocheted Lamp Cozy// Free P...: Hello there & Happy Tuesday to you! This lamp shade has been sitting on my desk, entirely bare and entirely boring that I decided it n...
 Hello there & Happy Tuesday to you! This lamp shade has been sitting on my desk, entirely bare and entirely boring that I decided it needed to spruced up! This DIY was put to very good use with helping to create a bright and colorful environment for my desk space. So I've decided to still use my challenge in only utilizing yarn from my used/scrap bin of yarn to create a lamp shade cozy!
 Ingredients: Crochet Hook>>K101/2-6.50MM
Scissors
Scrap Yarn used>>1 Skein of (hot pink), 1 Skein of (turquoise), 1 Skein of (canary yellow) of Red Heart Super Saver Yarn and 1 Skein (off white) of
Stitch guide
SC= single crochet HDC= half double crochet
DC= double crochet
SS= slip stitch
ST(S)= stitch(es)
CH= chain
YO= yarn over
 Step 1
Starting with the hot pink yarn.
CH 80
Row 1: HDC the entire row, in all of the STS. At the end of the Row. SS, cut of yarn and sew in the edges.
Row 2: Insert off white yarn, CH 3, skip the first ST, DC into the following ST, skip the following ST, DC into the following. *Repeat this method until the end of the Row. SS, cut of yarn and sew in the edges.
Row 3: Insert turquoise yarn, into the first white ST, CH 3, into the opening of the white yarn, YO two times insert your hook into the space, pull through the yarn and CH 1. You will repeat this method until the end of the row.
Row 4: Insert canary yellow yarn, into the first white ST, CH 3, into the opening of the white yarn, YO two times insert your hook into the space, pull through the yarn and CH 1. You will repeat this method until the end of the row.
Row 5: Insert hot pink yarn, into the first white ST, CH 3, into the opening of the white yarn, YO two times insert your hook into the space, pull through the yarn and CH 1. You will repeat this method until the end of the row.
Row 6: Insert white yarn, into the first white ST, CH 3, into the opening of the white yarn, YO two times insert your hook into the space, pull through the yarn and CH 1. You will repeat this method until the end of the row.
Row 7: SC the entire row, SS, cut off the yarn to sew in the edges.
Note: For this lamp I had to create this piece two times because I wanted to keep the middle detail of this specific lamp. If you want to create a full crocheted lamp shade, please continue past Row 6 alternating colors!
 Step 2
I decided to sew the crocheted pieces directly to the lamp shade, for a snug fit, without applying glue or any other holding.


 ashlee elle.
DIY: How To Make This Crocheted Lamp Cozy// Free Pattern!


Scissors
Scrap Yarn used>>1 Skein of (hot pink), 1 Skein of (turquoise), 1 Skein of (canary yellow) of Red Heart Super Saver Yarn and 1 Skein (off white) of
Stitch guide
SC= single crochet HDC= half double crochet
DC= double crochet
SS= slip stitch
ST(S)= stitch(es)
CH= chain
YO= yarn over

Starting with the hot pink yarn.
CH 80
Row 1: HDC the entire row, in all of the STS. At the end of the Row. SS, cut of yarn and sew in the edges.
Row 2: Insert off white yarn, CH 3, skip the first ST, DC into the following ST, skip the following ST, DC into the following. *Repeat this method until the end of the Row. SS, cut of yarn and sew in the edges.
Row 3: Insert turquoise yarn, into the first white ST, CH 3, into the opening of the white yarn, YO two times insert your hook into the space, pull through the yarn and CH 1. You will repeat this method until the end of the row.
Row 4: Insert canary yellow yarn, into the first white ST, CH 3, into the opening of the white yarn, YO two times insert your hook into the space, pull through the yarn and CH 1. You will repeat this method until the end of the row.
Row 5: Insert hot pink yarn, into the first white ST, CH 3, into the opening of the white yarn, YO two times insert your hook into the space, pull through the yarn and CH 1. You will repeat this method until the end of the row.
Row 6: Insert white yarn, into the first white ST, CH 3, into the opening of the white yarn, YO two times insert your hook into the space, pull through the yarn and CH 1. You will repeat this method until the end of the row.
Row 7: SC the entire row, SS, cut off the yarn to sew in the edges.
Note: For this lamp I had to create this piece two times because I wanted to keep the middle detail of this specific lamp. If you want to create a full crocheted lamp shade, please continue past Row 6 alternating colors!

I decided to sew the crocheted pieces directly to the lamp shade, for a snug fit, without applying glue or any other holding.


Atelier Marie-Lucienne: Tutorial „Early Valentine“ Hearts - Anleitung Herz...
Atelier Marie-Lucienne: Tutorial „Early Valentine“ Hearts - Anleitung Herz...: De ar friends , I had not come round to writing the pattern of the hearts of the „Early Valentine“ wreath in my last post y.
I had not come round to writing the pattern of the hearts of the „Early Valentine“ wreath in my last post yet, but I've got it ready now.


..
Tutorial „Early Valentine“ Hearts - Anleitung Herzen „Früher Valentin“

Dear friends,
Notes:
- I started each new round with a standing stitch (no chains) and made an invisible join at the end
- Make two halves (will be joined in round 6)
- Even though I used Gründl Cotton Fun (and a N°3,5 hook), the hearts can be crocheted in any yarn you like (using the corresponding hook).
Materials:
- crochet hook
- yarn sewing needle
- yarn in different shades
- fiberfill
Abbreviations:
- ch = chain stitch
- dc = double crochet
- dtr = double treble
- htr = half treble
- loop = loop made of ch
- mc = magic circle
- ss = slip stitch
- tr2tog = 2 tr together
Instructions:
Start with MC
Round 1: 8x (tr2tog + ch 2)

Round 2: 8x (ch 3 in each loop)

Round 3:
- it might be easier to start at the pointy end of the heart (even though I did not as you can see in the pictures); look at the following picture though for finding the right stitch to start from
- (tr + ch 1 + dtr + ch 1 + tr) + 2 tr + 2x 1tr + 2 tr + 2x 1tr + 2 tr + 2x 1tr + 2 tr + (tr + htr) + dc + (htr + tr) + 2 tr + 2x 1 tr + 2 tr + 2x 1 tr + 2 tr + 2x 1 tr + 2 tr


Round 4:
- again it might be easier to start at the pointy end = insert hook into dtr
- (dc + ch 2 + dc) + 2x 1 dc + 5x 1 htr + 4x 1 tr + 2 tr + 2x 1 tr + 2 tr + 1 tr + (tr + htr) + ch 1 + skip 1 stitch + dc (in dc) + ch 1 + skip 1 stitch + (htr + tr) + 1 tr + 2 tr + 2x 1 tr + 2 tr + 4x 1 tr + 5x 1 htr + 2x 1 dc

Round 5:
- decorative strips are made out of ss
- look at picture for orientation
- make one side at the time


Round 6:
- join both sides with dc in each stitch, except:- skip both ch at the top of the heart- (dc + ch 2 + dc) in both loops- do not forget to stuff the heart!


Happy crocheting!

P.S.: If you'd come across a mistake – please let me know!
P.S.2: I'll keep in touch!
 |
| Already made some more hearts... |
viernes, 29 de enero de 2016
Living the Craft Life: Peacock Feather Applique - Free Pattern
Living the Craft Life: Peacock Feather Applique - Free Pattern: I love the colors in the peacock feather. I have had this idea to come up with a peacock feather pattern for a LONG time... at least 6 month...
Peacock Feather Applique - Free Pattern
I love the colors in the peacock feather. I have had this idea to come up with a peacock feather pattern for a LONG time... at least 6 months. After our move and things finally settling down, I was able to sit down and come up with the pattern. I had to make MANY different versions before I was satisfied with the accuracy and neatness of the pattern. I hope you LOVE it!

Materials:
Worsted Weight yarn in 4 colors (I used Caron Simply Soft: A=Passion, B=Blue Mint, C=Bone, D=Pistachio)
Size H Hook
Yarn Needle
Scissors
Gauge:
Using H hook and materials listed feather should be about 4” tall and 3” wide.
Special Stitches:
3-Picot
Tr
Pattern:
Round 1: WITH COLOR A: In magic loop, ch 3(counts as dc) and dc 8 (9 dc total), CHANGE TO COLOR B and dc 3 more times in magic loop. Pull tail tight to close loop.
Round 2: Continuing with COLOR B, immediately sc in top of ch 3 of color A. Then 2 sc in next ch, 1 sc in next, 2 sc in next, 3 hdc in next, 2 sc in next, 1 sc in next, 2 sc in next, 1 sc in next, sl st to join and fasten off.
Round 3: Attach COLOR C to same ch-sp (corner of colors A and B), ch 1 and sc in same st, sc in next 2 sts, 2 sc in next, sc in next, hdc in next 2 sts, 2 hdc in next, dc in next, 2 dc in next, 2 tr in next 2 sts, 2 dc in next, dc in next, 2 hdc in next, hdc in next 2 sts, sc in next, sc in same ch as first sc, sl st to join and fasten off.
Round 4: Attach COLOR D to same ch-sp, ch 1 and sc in same st, sc in next 2, 2 sc in next, sc in next 2, 2 sc in next, hdc in next 6 sts, 2 hdc in next, 2 dc in next, 3-picot, 2 dc in next, 2 hdc in next, hdc in next 6 sts, 2 sc in next, sc in next 2, then sc in the first ch of the row, sl st to join. Fasten off.
Make a whole bunch and sew them together to make amazing gifts. Post links in the comments of things you've made, I want to see!
jueves, 28 de enero de 2016
Adornos Malulu: Blackstone Designs: Numbers
Adornos Malulu: Blackstone Designs: Numbers: Blackstone Designs: Numbers : These numbers were made to go with the Birthday Party Hat pattern. Of course, they can be used for a...
Illuminate Crochet: Special Yarn Gift from Claire
Illuminate Crochet: Special Yarn Gift from Claire: My friend Claire enjoys a bit of indie dyeing. She happened to bring some yarn for me to the most recent meeting of the Rainy Sunday Knitter...
Hopeful Honey | Craft, Crochet, Create: Oversized Scarf Crochet Pattern
Hopeful Honey | Craft, Crochet, Create: Oversized Scarf Crochet Pattern: As we near the end of the year, I'm reminded of the numerous blessings and difficult trials that the past 12 months have held. The...

What You'll Need
Finished Size
Taking your 12.00mm crochet hook and super bulky yarn, start of by making a Slip Knot, then crochet 20 Chains.
Row 1~ Chain 2. Crochet 1 Half Double Crochet into the fourth chain from your hook. Then crochet 1 Half Double Crochet into the next 18 chains. You should have 20 stitches now.
Row 2 - 100~ Chain 2. Crochet 1 Half Double Crochet into every stitch across.
Fasten off, and weave in loose ends.

Fringe
Taking your super bulky yarn, cut 20 strands of yarn, making sure every strand is at least 22 inches long. Fold each strand in half/double. Then knot one folded strand into every stitch along the one end of the scarf.
Repeat the fringe on the other end of the scarf.
Row 4~ Chain 2. Crochet 1 Half Double Crochet into the next 2 stitches. Crochet 1 Cable Stitchinto the next 8 stitches. {Note: I have an easy video tutorial below on how to crochet the cable stitch.} Then Crochet 1 Half Double Crochet into the last 3 stitches.
Fasten off, and weave in loose ends.
Repeat pocket pattern once more to make a pair.
Now taking your tapestry needle and yarn, sew one pocket onto the top of each end of the scarf.

Hope you all enjoyed this winter-y pattern!

Oversized Scarf Crochet Pattern
As we near the end of the year, I'm reminded of the numerous blessings and difficult trials that the past 12 months have held.
The decision to sponsor a child was by far the best choice I made, since it constantly reminds me of how grateful I should be for everything. The good and the bad.
I also created the most amazing memories/inside jokes with my wonderful friends. They are honestly the loveliest and funniest people ever!
Even being able to care for my mum this year after she had surgery was such a blessing, since I was finally able to be there for her for a change. She's always been so selfless, touching the lives of everyone around her with love and kindness.
True, 2014 was one of the busiest years I've had to date, but I wouldn't have wanted it any other way! It might have been a bit crazy, but I enjoyed every single second since I was surrounded by the people I love!
So now that that's out of the way, I hope you enjoy my last blogpost of 2014. I look forward to creating more in the future!

What You'll Need
12.00mm Crochet Hook
925g Super Bulky Yarn {14ply} - I used Lincraft Luxe
Scissors
Tapestry/Wool Needle
Finished Size
Width - 10"

~ Scarf ~
Taking your 12.00mm crochet hook and super bulky yarn, start of by making a Slip Knot, then crochet 20 Chains.
Row 1~ Chain 2. Crochet 1 Half Double Crochet into the fourth chain from your hook. Then crochet 1 Half Double Crochet into the next 18 chains. You should have 20 stitches now.
Row 2 - 100~ Chain 2. Crochet 1 Half Double Crochet into every stitch across.
Fasten off, and weave in loose ends.

Fringe
Taking your super bulky yarn, cut 20 strands of yarn, making sure every strand is at least 22 inches long. Fold each strand in half/double. Then knot one folded strand into every stitch along the one end of the scarf.
Repeat the fringe on the other end of the scarf.
~ Cabled Pockets ~
Taking your yarn and 12.00mm crochet hook, start of by making a Slip Knot, and then crocheting 14 Chains.
Row 1~ Chain 2. Crochet 1 Half Double Crochet into the fourth chain from your hook. Then crochet 1 Half Double Crochet into every chain across. You should have 12 half double crochets now.
Row 2~ Chain 2. Crochet 1 Half Double Crochet into the next 2 stitches. Crochet 1 Front Post Double Crochet into the next 8 stitches. Then Crochet 1 Half Double Crochet into the last 3 stitches.
Row 3~ Chain 2. Crochet 1 Half Double Crochet into the next 2 stitches. Crochet 1 Back Post Double Crochet into the next 8 stitches. Then Crochet 1 Half Double Crochet into the last 3 stitches.Row 4~ Chain 2. Crochet 1 Half Double Crochet into the next 2 stitches. Crochet 1 Cable Stitchinto the next 8 stitches. {Note: I have an easy video tutorial below on how to crochet the cable stitch.} Then Crochet 1 Half Double Crochet into the last 3 stitches.
Row 5~ Repeat row 3.
Row 6~ Repeat row 2.
Row 7~ Repeat row 3.
Row 8~ Repeat row 4.
Row 9 - 12~ Repeat rows 5 - 8 once. {Note: You can either add or take away a couple sets of row 7 - 10, depending on your head's circumference.}
Row 13~ Repeat row 3.
Row 14~ Repeat row 2.
Row 15~ Repeat row 3.
Row 16~ Single Crochet all around the edge of your pocket. {Note: When you reach the corners, crochet 1 single crochet in that stitch. Chain 2, then crochet 1 single crochet into the same stitch again to create a nice corner.} Slip Stitch into the first single crochet.Fasten off, and weave in loose ends.
Repeat pocket pattern once more to make a pair.
Now taking your tapestry needle and yarn, sew one pocket onto the top of each end of the scarf.

Hope you all enjoyed this winter-y pattern!
If you did crochet this, please post a photo of your creation onto my Facebook Page.
I'd love to see it!
Have a lovely day crocheting,
Hopeful Honey | Craft, Crochet, Create: Coral Sea Scarf & Wrap - Free Crochet Pattern
Hopeful Honey | Craft, Crochet, Create: Coral Sea Scarf & Wrap - Free Crochet Pattern: There's nothing better than being able to wrap up in something extra cosy on an especially chilly evening! True, summer is amazing (...

There's nothing better than being able to wrap up in something extra cosy on an especially chilly evening!
True, summer is amazing (and by far my favourite season), but there is a sense of charm about wearing five layers while snuggling up under a fluffy blanket, crochet project in hand!.. In other words, my ideal Friday night!
This coral wrap happens to be one of my latest projects, which I personally feel would be absolutely perfect to throw on when heading out, as it adds a pop of colour to any autumn or winter-y outfit!
Do you love piling on the layers too? If so, be sure to check out my pattern for a ribbed infinity scarf or my chunky cottontail scarf!

Coral Sea Scarf & Wrap - Free Crochet Pattern

There's nothing better than being able to wrap up in something extra cosy on an especially chilly evening!
True, summer is amazing (and by far my favourite season), but there is a sense of charm about wearing five layers while snuggling up under a fluffy blanket, crochet project in hand!.. In other words, my ideal Friday night!
This coral wrap happens to be one of my latest projects, which I personally feel would be absolutely perfect to throw on when heading out, as it adds a pop of colour to any autumn or winter-y outfit!
Do you love piling on the layers too? If so, be sure to check out my pattern for a ribbed infinity scarf or my chunky cottontail scarf!
Materials
8.00mm (L) Crochet Hook
350yds Chunky Yarn (12ply) - I used Wendy Supreme Cotton Chunky
Tapestry Needle
350yds Chunky Yarn (12ply) - I used Wendy Supreme Cotton Chunky
Tapestry Needle
2x Buttons (2" x 2")
Size
Fits 13 Years & Up - Easily adjustable
Width - 10.5" (27cm)
Length - 43" (109cm)
Gauge
4 rows & 4 stitches in cluster st = 3 inches
Stitches & Abbreviations


Hope you all enjoyed this chunky and super cosy pattern!
If you did crochet this, please post a photo of your creation onto my Facebook Page.
I'd love to see it!
Have a lovely day crocheting,
Suscribirse a:
Entradas (Atom)