martes, 2 de febrero de 2016

The Lazy Hobbyhopper: Frilly striped pillow cover - free stitch pattern

The Lazy Hobbyhopper: Frilly striped pillow cover - free stitch pattern: Finally I managed to make a tutorial for the frilly stitch pattern. You can use this pattern to make a pillow cover as I did, or a

Frilly striped pillow cover - free stitch pattern


Finally I managed to make a tutorial for the frilly stitch pattern. You can use this pattern to make a pillow cover as I did, or a beautiful lacy afghan or a bag or whatever you fancy. I made a cover for a pillow measuring 14 x 14 inches using sport weight yarn and size E/3.50 mm hook.

Instruction

The pattern is written using American terms.
The pattern is worked top down.

Abbreviations:

ch - chain  
sc - single crochet (UK -double crochet)
dc - double crochet (UK - treble)
tr- treble crochet (UK - double treble)
st - stitch


To make a cover for a pillow measuring 14 x 14 inches use sport weight yarns of various colours and size E/3.50 mm hook. 

Start with making 80 chains. If you are making something else using the stitch pattern you will need to make chains in multiples of 13 and add 2 more chains to it. So it's multiples of 13+2. 

Row 1: For the pillow cover using colour A I made ch 80, sc in 2nd ch from hook, ch 3, skip 3 ch, sc in next ch, ch 5, skip 4 ch, sc in next ch, **[ch 3, skip 3 ch, sc in next ch] 2 times, ch 5, skip 4 ch, sc in next ch** Repeat from ** to ** 4 more times, ch 3, skip 3 ch and sc in last ch. Turn. 


Row 2: Ch 4, dc in same st, ch 1, skip the next ch-3 space, and **(2-dc cluster, picot, ch 1) 5 times in next ch-5 space, skip next ch-3 space, (dc, ch 1, dc - called V) in next sc, ch 1** Repeat from ** to ** across finishing the row with V worked in the last sc. Turn.

Note: 
  • 2-dc cluster is dc 2 stitches worked together in same space.
  • To make a picot, ch 3 and sc in dc cluster worked prior to ch 3, this will form a loop at the top of the cluster.

Row 3: Ch 4, dc in same st, ch 2, **dc in ch-1 space next to the 1st cluster, ch 5, dc in the ch-1 space before the 5th cluster, ch 2, V in next V, ch 2** Repeat from ** to ** across finishing with V worked in last V. Turn.


Row 4: Ch 4, dc in same st, ch 1, **(2-dc cluster, picot, ch 1) 5 times in next ch-5 space, ch 1, V in next V, ch 1** Repeat from ** to ** across finishing with a V worked into last V.


You will be changing to new colour at the end of row 4. For that, pull the new colour through the loop, tighten the loop and start working with the new colour. 

Row 5: Repeat row 3 using new colour.


Repeat rows 4 and 3 until you reach the desired length and finish with row 4. Change colour after every 4 rows.


You are not going to make a separate piece for the back part of the pillow cover, instead you will make one long piece, fold it into half and sew the sides. The back part consists of just treble stitches. Three rows of treble were equal to 4 rows of frilly pattern at the front. 

So when you have reached the length of pillow stop working the frilly pattern. Stop at row 4 repeat and continue the next row in the same colour that you are working with currently. My last colour was brown, so I continued with brown.

Row 1 (back): Ch 4 (counts as 1st treble), 3 tr in next space, **tr in next dc, 4 tr in next ch-5 space, tr in next dc, 2 tr in next ch-2 space, tr in next dc, tr in ch-1 space, tr in dc, 2 tr in next ch-2 space** Repeat from ** to ** across finishing with 3 tr worked into the last space and 1 tr in the turning ch of previous row (79 sts)

Row 2: Ch 4 (counts as 1st tr), tr in each tr across. Turn (79 sts).

Repeat row 2 changing colours after every 3 rows but this time you will be reversing the order of colours used in the front part. 


Weave in all the ends and fold it into half. Bring the wrong side out and sew/crochet the sides together. If you do not want the stitches to be visible through the sides of the lacy pillow use threads/yarns of similar colours which means you will have to change your thread colour every 4 rows. Sew buttons.


Please do let me know if there are any corrections to be made. 

Have a nice day! beaut...

Annaboo's house: The one with a bobble stitch cushion

Annaboo's house: The one with a bobble stitch cushion: I've been meaning to get this pattern out for months, I tell you. It's one of those which has been lingering in my design book, wai...

The one with a bobble stitch cushion

I've been meaning to get this pattern out for months, I tell you. It's one of those which has been lingering in my design book, waiting for me to take some photos and make a YouTube tutorial to accompany it.
And I've finally done it.


It's not at all difficult and involves a hook, yarn, some double crochet and some bobble stitches. 
And a few buttons.
And a cushion that measures 45cms*


* ok, that's a teeny lie. I used a 45 cm cushion, but this pattern can be easily adjusted for any size- see under the pattern for how to do it.

Onwards.

Bobble Stitch Cushion

Pattern written in UK terms
ch = chain
dc = double crochet
yoh = yarn over hook

To make the bobble stitch:
1) Yoh, hook into stitch, yoh, draw yarn through stitch.
    Yoh, draw yarn through first 2 loops (2 loops on hook)
2) repeat (3 loops on hook)
3) repeat (4 loops on hook)
4) repeat (5 loops on hook)
5) repeat (6 loops on hook) 
6) Yoh, draw yarn through all loops.


You need:
Hook and yarn (what ever you fancy here. I used 4 x balls of Lion Brand Wool-Ease Thick and Quick in Glacier (shade 105) and a 12 mm hook.
Cushion
Buttons (I used 4 x 2.5cm)

Pattern
Both sides of the cushion are crocheted in rows. At the beginning of each row, turn your work and ch1.

Front of cushion (make 1)

Foundation chain: ch31
Row 1: dc in each st across row (31 sts)
Row 2: dc 3, *bobble in next st, dc 3* repeat from * to * across row
Rows 3-5: dc in each st across row (31 sts)
Row 6: dc 5, *bobble in next st, dc 3* repeat from * to * across row, until you have 5 sts left, then dc 5.
Rows 7-9: repeat row 1
Rows 10-37: repeat the pattern: row 2, then x3 rows of dc, then row 6, followed by x3 rows of dc 

Back of cushion (make 1)
Foundation chain: ch31
Rows 1-37: dc in each st across row (31 sts)

To make up:
Align the front and back pieces with wrong sides together with the bobble side facing you, right-way-up. Beginning at the top left corner and working in a clockwise direction, dc three of the sides together. You will need to put 3 dcs in the corner stitches. Stitch a few buttons along the top of the cushion, on the wrong side of the bobble edge. Use the spaces between the stitches on the back piece as button holes.


To adjust this pattern to fit any cushion, you need to alter the width and height of the front and back panels. To adjust the width, make sure your foundation chain is a multiple of 4 and add 3 more. To change the height, simply add or subtract the total number of rows. 
Simples.

Enjoy all your crafty endeavours this week,
Sarah xx

Cats-Rockin-Crochet, Free Crochet and Knit Patterns: Give An Old Light Shade A Face Lift

Cats-Rockin-Crochet, Free Crochet and Knit Patterns: Give An Old Light Shade A Face Lift:     Don't throw those tired old light shades out, they can be be brought back to life with a bit of imagination, a crochet h...

Give An Old Light Shade A Face Lift


crochet an old light shade 
Don't throw those tired old light shades out, they can be be brought back to life with a bit of imagination, a crochet hook and some yarn. Here are three that I plan on working on and I have finished the first one.

crochet an old light shade 2

I wanted a simple and open light light shade to go over the dining table.

I cut and tore the existing shade off it's frame
crochet an old light shade 3
 I then gave it a clean
crochet an old light shade 3
 I crocheted some diamond shapes to fit within each section
crochet an old light shade 4
Then I tied them on at each end
crochet an old light shade 5
I used a budget acrylic yarn
crochet an old light shade 6
 Next I had to secure the diamond shape with some chains and slip st's, I began at the center of the diamond on the frame, to keep it evenly placed
crochet an old light shade 7
I added more rows of chains and sl st's at an even space
crochet an old light shade 8
Then I began to wrap the exposed frame with a sl st, I used my fingers instead of the crochet hook as it was easier for me
crochet an old light shade 9
I could have added more elements to the light shade, but as I said I wanted something simple.
crochet an old light shade 10
I'm glad I took the time to wrap the exposed frame, the variegated yarn looks quite impressive.
Thanks for taking the time to read my post
I have another light shade I made not long ago if you would like to see that, just follow this link
crochet an old light shade again

dottie angel: a bit of 'lo and beholdness' continued...

dottie angel: a bit of 'lo and beholdness' continued...: ta dah! a 'lo and beholdness' circle of crocheted goodness becomes a 'lo and beholdness' warm and woolly coat for a cold m...

a bit of 'lo and beholdness' continued...

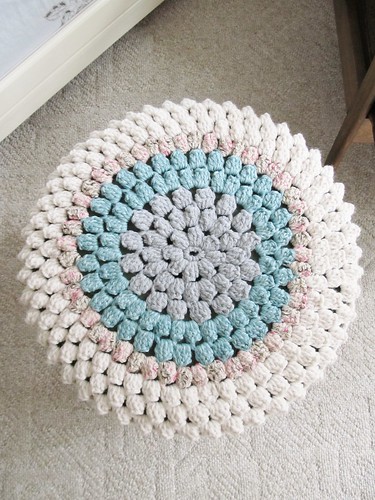
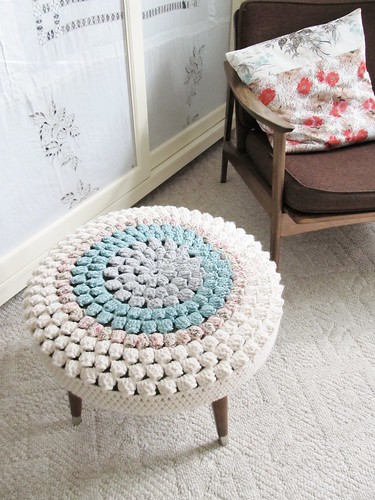
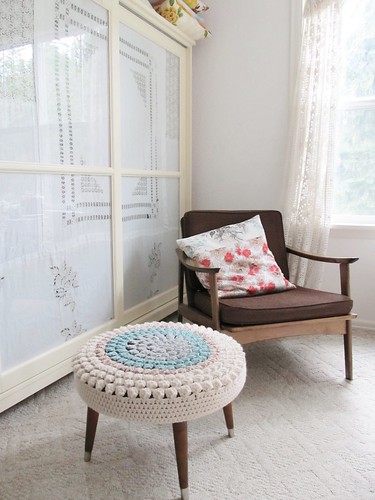
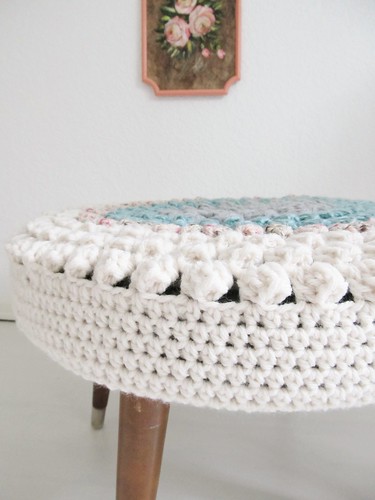
ta dah! a 'lo and beholdness' circle of crocheted goodness becomes a 'lo and beholdness' warm and woolly coat for a cold mid century stool.


yes indeedy, it never ceases to amaze me what lovely yarny grandness can come from a few balls of yarn and stick with a little hook. when my little warm and woolly coat was finished up, my little crafty heart swelled with pride. i am not saying this is a big headed kind of way, no sirree, not me. i am saying it in a 'blimey, did i really make that bit of yarny goodness with my own hands' kind of way. oh such is the fabbiness of craftiness. after all it is a circle and up until now a crocheted circle has been out of my crocheting ability reach.


once again however i am reminded, with determination and a little bit of patience and many many moments of not succeeding in the ways of being a 'roundie', my perseverance has paid off. my lovely little stool with his woolly coat is living in my crafty snug upstairs. such is my love for him i have warned all clan members, with or without fur, it is out of bounds.
within seconds of placing my little 'lo and beholdness' jacket upon my stool, Our #3 said "oh, you've finished, great can we sit on it now?" and plonked himself down on my 'moment of roundie glory'. the shriek that followed alerted him to the fact, yes it was finished and no, you cannot.

i have noted over the past few weeks the petals are slowly flattening, and at times the cover appears to have shuffled to the side a bit. i have no evidence that others are sitting on my stool, or resting their feet, however i have sneaky suspicions 'when the cat is away, the mice will play'.

if by chance you fancy yourself a little roundie woolly coat for a cold stool, or indeed just wish to continue making a larger circle of petals and head towards a lovely rug for the floor, or a smaller one to make a cushion cover, then i am happy to share how i did it.


however before we begin, let me tell you several nitty gritty things.
1. this is not a 'how-to' for the petals, i am assuming you have already studiedMille's lovely pattern for petals, she so generously shared with us the other day
2. i used chunky yarn and a size Mr Hook 6.5mm K. where i did not have chunky in the colours i wished to use, i doubled up a worsted weight yarn. in fact the aqua colour i used is made up of two different shades put together and it came out spiffily in my books (do you like that! i do too, it is so much more than just spiffy, it is most spiffily, my new favourite word)
3. if you have understood how to make Mille's petals then you will understand what i am talking about below, if you have not understood, then i fear it will all read like gobbledy de goop.
4. i did have to rip out several rounds as the circle grew to keep it flat but i was determined not to be beat. you may well have to do the same.
5. all along i continued to check the fit with my stool after every round, just to make sure i was on the right track. each stool will be different so this is just a rough guide to help you along.

so hey ho, let's go

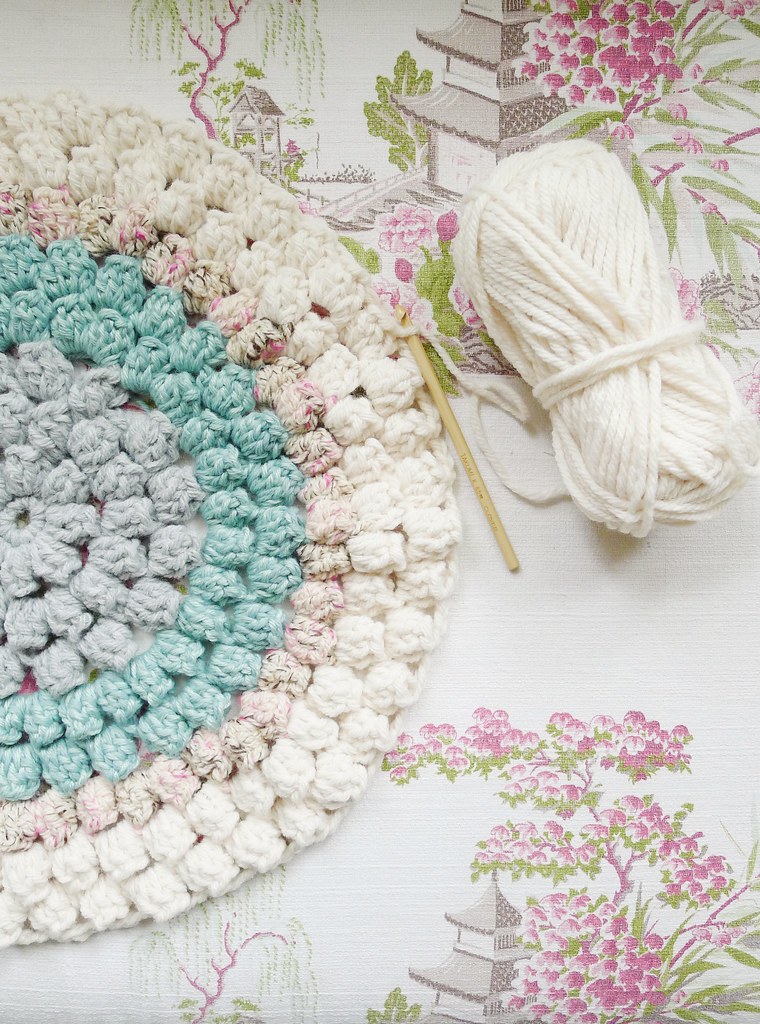
round 1, 2 and 3: as written in Mille's pattern
round 4 and 5: repeat round 2 and 3
round 6: repeat round 2
round 7: alternate between single petals and double petals
round 8, 9 and 10: repeat round 2

i stopped here as this was big enough for the top of my stool. if you are going on to make a rug, you will have to decide if rounds of single petals or alternating between single and double petals in a round will increase the circle nicely and flatly.


after my last round of petals, i half double crocheted (US term) all the way around joining at the end of the round and chaining up 2, to begin the next. you do no wish to increase as you are now working on the edge. i ended up with seven rounds of half double crochet to fit my stool's side.
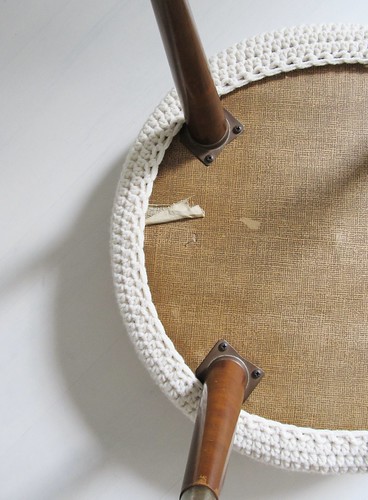
to make the cover sit still and not move around or slip off (the stool is vinyl underneath) i then did a final row of single crochet missing out every other stitch from the row before, giving it a nice almost elastic edging to it.


i carefully placed the cover over the stool, not wishing to stretch the final round of stitches too much and damage them and Voila! it flipping fitted! it was indeed a small miracle.
i think a cushion cover would be most peachy and i have plans to work on one if i can find the printed out instructions of Mille's fabby pattern. i placed them somewhere super duper safe so i would not forget to pack them for Old Blighty. so safe, i have lost them...

she is hoping it all makes sense and wishes you a few crafty moments with your Mr Hooks this weekend ~ Tif
footynote: Mr Spell Checker found over 22 issues today, he particularly found 'spiffily' to cause him fretfulness like never before

lunes, 1 de febrero de 2016

Zooty Owl's Crafty Blog: Starflower Mandala: Pattern

Zooty Owl's Crafty Blog: Starflower Mandala: Pattern: About a week ago I made a STARFLOWER MANDALA I posted this photo in online groups and within a few hours I had hundreds of requests for ...

Starflower Mandala: Pattern

About a week ago I made a STARFLOWER MANDALA

I posted this photo in online groups and within a few hours I had hundreds of requests for the pattern,


mandala

I started making another Starflower Mandala so that I could write up the pattern;   while I was writing it up a few lovely ladies from various crochet groups were helping me test the pattern.

We completed the first phase of the testing yesterday morning after I had finished my second mandala:


mandala

Another group of lovely ladies helped me run a second test - and I made a THIRD mandala:


mandala

I was going to do a complete tutorial for the pattern but the ladies who tested the pattern have assured me that the pattern is very easy to follow.

So, without further ado, here it is:

THE STARFLOWER MANDALA PATTERN


Yarn:  Stylecraft Special DK;    

Hook:  3.50mm

Size:  33cm in diameter 

Pattern Terms:  US

(I have included this conversion chart for my UK readers)


Foundation:  6ch, ss to first chain to form a circle

Row 1:  Into the circle,  2ch 2dc cluster, 3ch;   *3dc cluster, 3ch* crochet *to* 5x (6 clusters), ss  into top of first cluster to close,  break off yarn

Note:   a 3dc cluster is formed as follows - yarn over hook, work the first part of the stitch leaving 2 loops on your hook, repeat this twice more (four loops on hook) Yarn over hook and draw through the loops on the hook to form your cluster


mandala

Row 2:  Into any 3ch sp, 3ch, 3dc 1ch;  *into next 3ch sp, 4dc (4dc group), 1ch* *to* 5x   (24dc);  ss into top of 3ch at start of row to close


mandala
  
Row 3:  Join yarn in sp between 1st and 2nd dc on any 4dc group;  3ch, 1dc into same space;  2dc into each of next 2 spaces between dc;  8ch;  *2dc into each sp between dc on next 4dc group, 8ch* *to* 5x;   ss into top of 3ch at start of row to close.

Note:   3 x groupings of 2dc formed between each 8ch


mandala

Row 4:  Join yarn with ss into first dc after any 8ch sp;   ss through front and back loops on next 5dc;  *into 8ch sp, 1sc, 1hdc, 3dc, 1tr, 3ch, 1tr, 3dc, 1hdc, 1sc (Petal formed);  1ss through front and back loops on next 6dc* *to* x5;  into last 8ch sp, 1sc, 1hdc, 3dc, 1tr, 3ch, 1tr, 3dc, 1hdc, 1sc;  break off yarn.


mandala

I suppose there could be some debate about the correct way to end this row off, but this works for me:

With a tapestry needle, pull the yarn through from front to back on the first ss, pull to tighten neatly. then thread the yarn through the back loops on the next 5 ss.


mandala

Row 5:  Join yarn into the top of the 3rd dc on Row 3;   3ch, 1dc into top of next dc,  *3ch, 1sc into first dc on Petal, 1hdc into next dc,  1dc into each of next 2 stitches;  2dc, 1tr, 3ch, 1tr, 2dc into 3ch sp;  1dc into each of next 2 stitches, 1hdc into next dc, 1sc into next dc,  3ch;  1dc into each of the 3rd and 4th dc onRow 3* *to* x5;   3ch, 1sc into first dc on Petal, 1hdc into next dc,  1dc into each of next 2 stitches;  2dc, 1tr, 3ch, 1tr, 2dc into 3ch sp;  1dc into each of next 2 stitches, 1hdc into next dc, 1sc into next dc,  3ch,  ss into top of 3ch at start of row to close.

Row 6:  Join yarn into centre of any "middle" 2dc grouping, 3ch, 1dc;  *3ch, 1sc into first dc on Petal, 1hdc into next dc,  1dc into each of next 3 stitches;  2dc, 3ch, 2dc into 3ch sp;  1dc into each of next 3 stitches, 1hdc into next dc, 1sc into next dc,  3ch;  2dc into the centre of  "middle" 2dc grouping* *to* x5;   3ch, 1sc into first dc on Petal, 1hdc into next dc,  1dc into each of next 3 stitches;  2dc, 3ch, 2dc into 3ch sp;  1dc into each of next 3 stitches, 1hdc into next dc, 1sc into next dc,  3ch, ss into top of start 3ch

Row 7:  Join yarn into centre of any "middle" 2dc grouping, 1ch, 1sc;  *6ch, 1sc into first dc on Petal, 1hdc into next dc,  1dc into each of next 3 dc;  2dc, 3ch, 2dc into 3ch sp;  1dc into each of next 3 dc, 1hdc into next dc, 1sc into next dc,  6ch;  1 sc into the centre of  "middle" 2dc grouping* *to* x5;   6ch, 1sc into first dc on Petal, 1hdc into next dc,  1dc into each of next 3 dc;  2dc, 3ch, 2dc into 3ch sp;  1dc into each of next 3 dc, 1hdc into next dc, 1sc into next dc,  6ch, ss into start 1ch

Row 8:  Join yarn into first dc on right hand side of any petal 1ch, 1sc into same dc, 1hdc into next dc, 1 dc into each of next 3dc;  2dc, 3ch, 2dc into 3ch sp;  1dc into each of next 3dc; 1hdc into next dc, 1sc into next dc *6ch, 1sc into 6ch onRow 7; 6ch, 1sc into 6ch on Row 7; 6ch 1sc into first dc on petal, 1hdc into next dc, 1dc into each of next 3dc;  2dc, 3ch, 2dc into 3ch sp;  1dc into each of next 3dc, 1hdc into next dc, 1sc into next dc* *to* x5;  6ch, 1sc into 6ch on Row 7;6ch, 1sc into 6ch on Row 7; 6ch, ss into 1ch at start of row

Row 9:  Join yarn into 4th dc on right hand side of any petal;  3ch, 1dc into next dc;  2dc, 3ch, 2dc into 3ch sp;  1dc into each of next 2dc; *(6ch, 1sc into 6ch sp) x3;  6ch;  1dc into 4th dc on petal, 1dc into next dc;  2dc, 3ch, 2dc into 3ch sp;  1dc into each of next 2dc* *to* x5;  (6ch, 1sc into 6ch sp) x3;  6ch

Row 10:  Join yarn into third dc on right side of any petal;  2ch, 1hdc into next dc;  2hdc, 2ch, 2hdc into 3ch sp; 1hdc into each of next 2dc;  *6ch, 1sc into 6ch sp;  6ch, 4dc into next 6ch space;  4dc into next 6ch space;  6ch, 1sc into 6ch sp;  6ch, 1hdc into third dc on petal, 1hdc into next dc;  2hdc, 2ch, 2hdc into 3ch sp;  1hdc into each of next 2dc* *to* x5;  6ch, 1sc into 6ch sp;  6ch, 4dc into next 6ch space;  4dc into next 6ch space;  6ch, 1sc into 6ch sp;  6ch ss into top of 2ch at start of row

Row 11:   Join yarn into third hdc on right side of any petal;   2ch, 1hdc into next hdc, 3hdc into 2ch sp, 1hdc into each of next 2hdc;  *6ch, 3dc into 6ch sp;  6ch,  (1tr into each of next 4 dc) x2;  6ch,  skip first 6ch sp, 3dc into next 6ch sp;  6ch 1hdc into third hdc, 1hdc into next hdc, 3hdc into 2ch sp, 1hdc into each of next 2hdc* *to* x5; ss into top of 2ch at start of row to close

Row 12: Join yarn between 3rd and 4th hdc on right hand side of any petal;  2ch, 1hdc between 4th and 5th hdc, *1ch;  6dc, into each of next two  6ch spaces; 1ch,  skip 1st tr on Row 11;  1tr into each of next 6 tr;  1ch;  6dc into each of next two 6ch spaces, 1ch;  1hdc between 3rd and 4th hdc;  1hdc between 4th and 5th hdc* *to* x5;  1ch;  6dc, 1ch into each of next 2  6ch spaces;  skip 1st tr on Row 11;  1tr into each of next 6 tr;  1ch;  6dc, 1ch into each of next 2 6ch spaces;  ss into top of 2ch at start of row to close 

Row 13:  Join yarn between 2hdc at top of petal;  2ch;  *1hdc into 1ch space, 1hdc into each of next 6dc;  1dc into each of next 6dc; 1tr into each of next 6tr;  1dc into each of next 6dc;  1hdc into each of next 6dc; 1hdc into 1 ch space;  1hdc into space between 2hdc at top of petal*  *to* x5;   1hdc into 1ch space, 1hdc into each of next 6dc;  1dc into each of next 6dc; 1tr into each of next 6tr;  1dc into each of next 6dc;  1hdc into each of next 6dc; 1hdc into 1 ch space,  ss into top of 2ch at start of row to close

Row 14:   Join yarn into second tr of any 6tr sequence on Row 13;   4ch, 1tr into each of next 4tr;  1dc into each of next  13 stitches;  1tr into each of next 2hdc;  1dc into each of next 13 stitches;   *1tr into each of next 5tr:  1dc into each of next  13 stitches;  1tr into each of next 2hdc;  1dc into each of next 13 stitches* *to* x 5;   ss into top of 4ch at start of row to close;

Row 15:  (EDITED)  Join yarn in space between any 2tr at top of petal;  5ch (counts as 1sc and 4ch), skip two spaces then 1 sc in next space;  *4ch, skip 2 spaces, then 1sc in next space*  until last 2 spaces, 4ch, ss into 1st chain at start of row

Row 16:  Join yarn in any 4ch space, 3ch, 2dc in same space, 1ch;  *3dc, 1ch in next 4ch space* to end of row, ss into top of 3ch at start of row to close

Row 17:   Join yarn in 2nd dc of any 3dc group on Row 16;  1ch, 1sc in same space as join, 1ch;  *dc spike to the left of the sc in Row 15;  dc spike to the right of the sc in Row 15 (crossover spike made), 1ch 1sc into the second dc of next 3dc group 1ch* *to* to end of row ss into 1ch at start of row to close.

Note:  When doing the spike stitch keep your tension even but not too tight

Row 18:  Join yarn  with a ss in 1ch sp to the left of any crossover spike, ss in next 1ch sp, *6ch, ss into 4th ch from hook;  ss into 1ch sp to the left of next crossover stitch, ss into next 1ch* *to* to the right of the last crossover spike;  6ch, ss into 4th ch from hook, ss into ss at start of row.

PS:  I have prepared a row by row photo aid to this pattern, which can be foundHERE

domingo, 31 de enero de 2016

(crochet) How To - Crochet a Hypercube - Yarn Scrap Friday

Crafting Friends Designs: Peaked Shell Afghan Crochet Pattern

Crafting Friends Designs: Peaked Shell Afghan Crochet Pattern: It's been a busy January!  I have so many fun new designs in the works, but it will be a while before I can share them with you.  To hel...

Peaked Shell Afghan Crochet Pattern

It's been a busy January!  I have so many fun new designs in the works, but it will be a while before I can share them with you.  To help fill in the gap of releases, I've worked up this pretty Peaked Shell Afghan crochet pattern for you.  It's simple, quick and has a fun little texture!

An ad free printable PDF of this pattern is available for $1 in my Ravelry shop here: http://www.ravelry.com/patterns/library/peaked-shell-afghan

Materials: I chose to use Caron Simply Soft because I had a bunch on hand and my girls loved the colors.  You could use any yarn for this project and just work it to your desired size.
The qty of yarn will depend on the size of the afghan that you make.  This will take around 2,500 yards for a 4'x4' size.

Hook:  I used a Boye size H.  Again, you may use your preferred hook size that works best with the yarn you choose.

Gauge: 3 DC & 2 Rows = 1"
Finished Size: Customizable
Skill Level: Easy
Stitches: St - Stitch
               Ch - Chain
               Sk - Skip
               Sp - Space
               Sl St - Slip Stitch
               SC - Single Crochet
               DC - Double Crochet
               PS - Peaked Shell
Special Stitches:
       Peaked Shell: 3 DC, Picot, 3 DC in same stitch
       Picot: Ch 3, sl st in 3rd Ch from hook
       HDC Foundation Chain: 
Notes: Ch 3 at the beginning of each row counts as a DC
            Change colors every 2 rows for a fun ripple color pattern

Begin with a HDC Foundation Chain in multiples of 4 + 1
       61: 2'     89: 3'     121: 4'     153: 5'            
       (2 Shell rows = 2" wide & 1" tall)
R1: Ch 1, turn, SC in next st, *sk next st, PS in next st, sk next st, SC in next st,* Repeat from *to* across

R2: Ch 3, turn, DC in same sp as Ch, working behind picot, SC around the strand just below the picot of next PS (see photo),  *PS in next SC, working behind picot, SC around the strand just below the picot of next PS,*  Repeat from *to* across, 2 DC in end SC
R3: Ch 1, turn, SC in next st, PS in next SC, *working in front of the picot, SC around the strand just below the picot of next PS, PS in next SC,* Repeat from *to* across, sk next st, SC in end st

Repeat R2 & R3 to desired height
SC evenly around the edges to finish off.  (I prefer to leave the shell section on top of this one instead of squaring it off)

Below is the result of changing colors every 2 rows


Mi lista de blogs

Buscar este blog