Scalloped Border Tutorial
How to crochet an easy scalloped border
1. Start where you are *or* slip stitch, then single crochet into same space.
Double crochet into second stitch from hook (call this stitch "home").
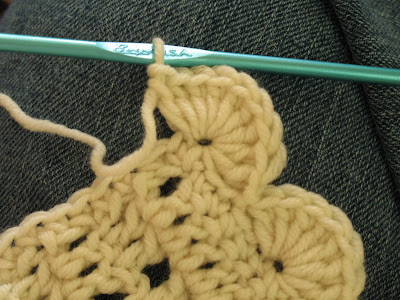
It should look like this:
Make six more double crochet stitches into "home".
After number seven, it should look like this:
Slip stitch into third stitch* from "home"...
...after which it should look like this (back where you started):
This gives you a very flat, even row of scallops.
To turn the corner: begin your scallop 2-3 stitches before the corner.
(Yes, I know this takes a little planning or finagling.)
Start it just like a regular scallop, using the corner stitch as "home".
A total of twelve double crochets will be made into "home".
Slip stitch into the third stitch around the corner from "home".
And there's your corner!
*Yes, I know that to be perfectly symmetrical you would slip stitch into thesecond stitch from home, but for some reason the scallops do not come out perfectly flat this way. Trust me. (Or try it yourself.)
This is my most popular post by a very huge margin! Well over 15,00023,000 69,000 84,000 92,000 115,000 views to date. Hello to everyone who has visited from Pinterest! (c: I'm so glad this has been helpful to so many and it has been a treat to see all the projects that have used it. Take a moment to look around, check out my other projects. Great to have you!


No hay comentarios:
Publicar un comentario